

Table of Contents
- Before You Install: Check Your SUV and Barrier Compatibility
- Step-by-Step: How to Fit a Dog Guard in a Car
- How to Install a Dog Car Barrier for SUV: Adjusting Width and Tension
- Dog Barrier Safety Checks After Installation
- How to Restrain a Dog in the Back of an SUV Beyond the Barrier
- Dog Crate Tie-Downs for Cars: Securing a Crate Instead of a Barrier
- Troubleshooting Common Dog Car Barrier Installation Problems
- Frequently Asked Questions
Last Updated: October 8, 2026
Before You Install: Check Your SUV and Barrier Compatibility
A dog car barrier only protects your pet if it fits your specific SUV. Before you buy or install anything, measure your cargo area and confirm the barrier matches your vehicle's make and model. This guide walks you through the full process, from unboxing to the final safety check.
Fitting a dog guard in a car is mostly about preparation. Get the compatibility check right and the rest takes about 20 minutes.
Match the Barrier to Your Vehicle Make and Model
Start with your SUV's year, make, and model. Barrier makers build to specific cargo dimensions, so a guard for a compact crossover will not fit a full-size SUV.
Check these three measurements against the product listing:
- Cargo width between the wheel wells
- Height from cargo floor to roofline
- Distance from the rear seatback to the tailgate
A barrier that is too wide will not sit flush. One that is too tall can press against the headliner and rattle.
Identify the Main Panel, Side Panels, and Mounting Hardware
Lay every part on a clean surface before you start. Most SUV barriers ship with the same core components:
- Main panel: the large wire grid that spans the cargo opening
- Side panels: smaller sections that close the gaps near the windows
- Mounting hardware: brackets, clamps, screws, and round covers
Count the screws and clamps against the parts list in the instruction manual. Missing hardware is easier to spot now than halfway through assembly.
Step-by-Step: How to Fit a Dog Guard in a Car
Here is how to install a dog car barrier for SUV models in about 20 minutes. The steps below work for most steel wire and metal frame barriers with a main panel and side panels.
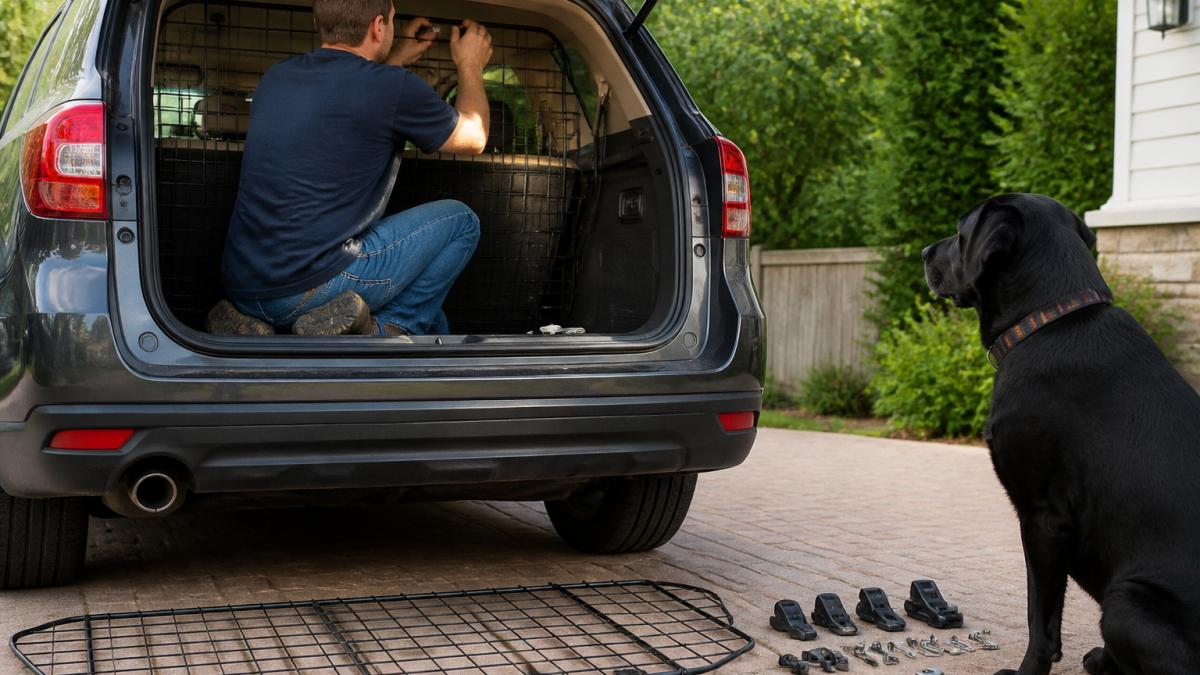
Assemble the Main Panel and Side Panels
Connect the side panels to the main panel first, before the barrier goes anywhere near the vehicle. Line up the bolt holes, hand-thread the screws, then tighten them once everything is aligned.
Keep the screws loose at this stage. A slightly loose frame is easier to position, and you will tighten everything into place later.
Position the Barrier Behind the Rear Seats and Attach Mounting Brackets
Lift the assembled barrier into the cargo area and stand it behind the rear seats. The main panel should sit upright, with the side panels facing the windows.
Now locate your fixing points:
- Fold the rear seats forward if you need more room to work
- Rest the barrier base on the cargo floor
- Line up the top of the frame with the headrest posts or roof mounts
- Clip or hook the top mounts into place
- Attach the lower brackets to the mounting points
Attach every bracket by hand first. Tighten with a screwdriver only after the whole frame sits square.
How to Install a Dog Car Barrier for SUV: Adjusting Width and Tension
Adjustment is the step where barrier designs diverge, so find your type first. The three common designs on the market adjust in completely different ways, and using the wrong method is why so many barriers end up rattling or bowing trim.
Tension-Fit Barriers
These use spring-loaded or threaded feet that press against the cargo walls, floor, and roofline. The barrier holds itself in place through outward pressure, there are no screws into the vehicle.
- Extend each foot until it just contacts the surface.
- Tighten each foot a quarter turn at a time, working diagonally.
- Stop when the frame stops moving under firm hand pressure. Over-tightening is the failure mode here: it bows the side panels inward and can crack plastic trim.
A tension-fit barrier that needs more than about a half turn past first contact to feel solid is usually the wrong size for your cargo opening.
Headrest-Mounted Barriers
These hang from the rear headrest posts using straps or metal hooks, with the base resting on the cargo floor or the seatback.
- Raise or remove the rear headrests to expose the posts.
- Loop the straps around both posts and pull them evenly, an uneven pull tilts the panel.
- Tighten the strap buckles until the frame sits vertical, then lock them.
Vehicle-Specific Guards
Factory-fit guards bolt to existing threaded points in the cargo area, often behind the rear seatback or on the D-pillar. These have the least adjustment range because they are built for one model.
2 Pack Adjustable Dog Seat Belt for Car →
- Hand-thread every bolt before tightening any of them.
- Snug in a cross pattern: top left, bottom right, top right, bottom left.
- Torque to the figure in your manual. If the manual gives no figure, snug plus a quarter turn is the common field standard, do not crank down on trim-mounted bolts.
The Tension Test That Actually Tells You Something
Push the center of the main panel with your palm. A correctly tensioned frame flexes slightly and springs back. Then push sideways near a top corner, this is the direction a dog leans during a turn, and it is where loose mounts show up first.
Re-check tension after the first drive. New hardware settles, and a barrier that felt solid in the driveway often needs a half turn after 20 minutes on the road.
Dog Barrier Safety Checks After Installation
Run a five-point check every time before your dog rides along. A barrier that passed last week can loosen after a bumpy drive.
- Shake the main panel by hand. No rattles or sliding
- Check every screw and clamp for tightness
- Confirm the side panels still touch the trim
One honest limitation: most dog car barriers are designed to keep pets in the cargo area, not to survive a high-speed crash. They are a separation tool, not a crash-tested restraint.
That is where [our 2 Pack Adjustable Dog Seat Belt for Car comes in](/products/adjustable-dog-seat-belt-for-car-2-pack-pet-safety-belts-for-vehicles-heavy-duty-nylon-puppy-harness-seatbelt-leash-for-driving-universal-fit-seatbelts-for-pets-in-suv-truck-travel-black).

How to Restrain a Dog in the Back of an SUV Beyond the Barrier
A barrier alone does not restrain your dog. It separates the cargo area from the passenger cabin, which stops jumping into the front seat but leaves your pet free to slide around the back.
For full restraint, add one of these:
- A crash-tested harness attached to a seat belt
- A secured crate, tied down to the vehicle
- A cargo-area tether rated for your dog's weight
[The Dog Bed Mat for Car Back Seat Extenders gives your dog a stable, comfortable surface on the second row](/products/dog-bed-mat-for-car-back-seat-extenders), which reduces sliding on turns and keeps the setup calmer for anxious travelers.

Dog Crate Tie-Downs for Cars: Securing a Crate Instead of a Barrier
Some dogs travel better in a crate than behind a barrier. If that is your dog, skip the guard and secure a crate instead.
Use two tie-down straps rated for at least the weight of the crate plus your dog.
Check the straps at every rest stop. A crate that shifts even a few inches on a hard brake can injure a dog inside it.
Troubleshooting Common Dog Car Barrier Installation Problems
Most installation problems trace back to fit or to using an adjustment method that does not match your barrier design. Work through the symptom, then the likely cause, then the fix, and note the "stop" condition, because some problems cannot be solved with more tightening.
| Problem | Likely Cause | Fix | When to Stop |
|---|---|---|---|
| Barrier rattles while driving | Loose screws, clamps, or tension feet | Tighten all hardware in a cross pattern; re-check after the first drive | If it still rattles when every fastener is snug, a mounting point is worn or the wrong size |
| Frame does not sit flush | Wrong width for your cargo opening | Adjust side panels outward; if they bottom out, the barrier is too narrow | Side panels fully extended and still gapped, exchange the model |
| Side panels leave gaps at the windows | Panels not pushed out fully, or trim shape blocks them | Extend panels until they contact trim | Trim contours prevent contact on both sides, this design will not seal |
| Barrier leans forward | Top mounts not seated, or headrest hooks slipping | Re-seat brackets and retighten; check hook engagement on the posts | Hooks will not stay seated on your headrest style, switch to a different mount type |
| Tailgate will not close | Barrier positioned too far back | Move the frame forward toward the rear seats | Frame is already against the seatback and still contacts the tailgate |
| Barrier blocks rear visibility | Frame too tall for your roofline | Lower the panel if adjustable | No height adjustment, this is a permanent trade-off of the design |
| Seat belts or seat release levers obstructed | Barrier mounted over the seatback hardware | Reposition brackets off the belt path | Mounting points force contact with the belt, do not install |
| Missing hardware | Incomplete shipment | Contact the seller for the parts list | Do not substitute hardware; unmatched bolts can strip trim threads |
Diagnose by Barrier Type
- Tension-fit: Rattles usually mean under-tensioned feet. Leaning usually means the top feet are not contacting the roofline. Both are adjustable, but if the feet are maxed out, the barrier is the wrong size.
- Headrest-mounted: Slipping hooks and tilting panels are the two recurring complaints. Check that the hooks match your headrest post diameter; some SUVs use thicker or angled posts that standard hooks will not grip.
- Vehicle-specific: Problems here are almost always installation error, not fit. Re-read the manual's torque and sequence steps before assuming the part is wrong.
The Unfixable List
Return or exchange the barrier, do not force it, if any of these are true:
- The frame contacts the glass or tailgate with the barrier seated against the rear seats.
- Mounting hardware blocks a seat belt, a seat-folding latch, or an airbag deployment path.
- The barrier requires drilling into trim or a structural panel that the manufacturer did not designate as a mounting point.
Forcing a barrier into a vehicle it was not built for bends the frame, and a bent frame loses the rigidity that makes it useful in the first place. A barrier that fits correctly needs hand-tight fasteners and a firm push to move, nothing more.
Frequently Asked Questions
Can a dog car barrier fit any SUV?
No. Most barriers are designed for a range of vehicle makes and models, but fit depends on the width between your SUV's interior walls and the height from cargo floor to ceiling. Measure both before buying. Adjustable designs with side panels cover more vehicles, but a barrier listed for a different model may leave gaps at the edges or sit too low. Check the product's compatibility list or measure your cargo area and compare it to the barrier's stated range.
How do you keep a dog barrier from rattling or shifting?
Rattling usually means the barrier isn't tensioned correctly. Tighten the adjustment screws or clamps until the main panel and side panels press firmly against the interior trim without denting it. If your barrier uses headrest mounts, confirm the straps or brackets are snug. Check the mounting points after the first few drives, since vibration can loosen hardware. A barrier that still shifts after tightening may be the wrong size for your SUV's cargo width.
How to restrain a dog in the back of an SUV safely?
A barrier keeps your dog in the cargo area, but it doesn't restrain the dog itself. For full restraint, pair the barrier with a crash-tested harness and a seat belt tether that clips into your SUV's seat belt buckle. The harness should fit snugly across the chest without rubbing. This setup prevents your dog from being thrown forward during sudden stops and keeps them from climbing over the barrier into the passenger area.
Do I need dog crate tie-downs for cars if I already have a barrier?
They serve different purposes. A barrier separates the cargo area from the passenger cabin, while tie-downs secure a crate so it doesn't slide or tip during braking and turns. If you use a crate instead of a barrier, tie-down straps attached to fixed mounting points in your SUV are essential. The crate should sit flat on the cargo floor with no more than a small amount of movement when you push against it.
Installing a dog car barrier takes about 20 minutes, but getting the fit right is what keeps your dog safe on every drive. At Paw Fit Gears, we carry travel gear built for exactly this: durable harnesses, vehicle seat belts, and back seat mats that work together as one setup. Pair your barrier with our adjustable dog seat belt and a back seat mat, and your SUV is ready for the road. Get started with Paw Fit Gears and build a travel setup your dog can ride in safely.